Alright, let's talk about seriously upgrading your warehouse or industrial space. That Rack Supported Platform you're eyeing (or maybe it's already sitting in crates waiting for you)? It's not just more floor space – it's a potential game-changer for workflow, storage density, and efficiency. But here's the deal: installing it wrong isn't just inconvenient; it's downright dangerous and can cost you big time in downtime, damage, or worse. Getting it set up right from the get-go is absolutely critical. This guide will walk you through the essential steps, safety must-dos, and pro tips to ensure your Rack Supported Platform delivers maximum value and safety for years to come. Buckle up!
Step 1: The Foundation – Planning & Prep is EVERYTHING
Before you even think about grabbing a wrench, put your planning hat on tight. Rushing this stage is the biggest mistake you can make.
- Know Your Loads (Inside & Out): This isn't guesswork. Precisely calculate the total dead load (the weight of the Rack Supported Platform structure itself, decking, stairs, railings) AND the maximum intended live load (people, equipment, stored materials). Don't forget dynamic loads like forklifts or pallet jacks moving on it! Your Rack Supported Platform supplier must provide certified load ratings – never exceed them. Period.
- Blueprint the Battle Plan: Get detailed. You need:Accurate Floor Plans: Mark column locations, obstructions (sprinklers, lights, HVAC), door swings, and clear aisles.Rack Layout Integration: The Rack Supported Platform isn't standalone magic; it integrates into your existing pallet rack system (or a new one). Map the exact beam levels and column positions it will connect to. Ensure the supporting rack is appropriately rated and configured.Platform Dimensions: Length, width, height – double-check against your space and operational needs (forklift reach, material flow).Access Points: Where will stairs, ladders, or gates go? Plan for safe, efficient entry/exit.
- Clear the Deck & Check the Stage: Physically prepare the site:Ensure the floor is level and capable of supporting the concentrated loads transferred through the rack uprights. Consult an engineer if unsure.Verify overhead clearance – lights, sprinklers, ductwork need ample space above the platform deck and any potential loads.Clear the installation area completely. Tripping over pallets while hoisting steel is a recipe for disaster.
Step 2: Getting the Goods – Inspection & Inventory
Your Rack Supported Platform kit arrives. Don't just start bolting!
- Thorough Receiving Inspection: Unpack carefully. Check every component against the packing list and engineering drawings. Look for:Damage (bends, dents, cracks, deep scratches – especially on critical load-bearing parts).Correct parts and quantities.Proper labeling and markings.Missing or damaged parts? STOP. Contact the supplier immediately. Do NOT attempt substitutions.
- Organize Like a Pro: Sort components logically near the installation area (beams, decking, connectors, safety hardware, stairs). Keep fasteners (bolts, nuts, washers) organized in labeled containers. Chaos slows you down and increases error risk.
Step 3: Building Blocks – Core Structure Assembly
Time to get hands-on. Precision and following the manufacturer's instructions (IM) exactly are non-negotiable.
- Assemble Supporting Frames (If Applicable): Some platforms use pre-assembled frames or trusses that then bolt to the rack. Assemble these on the ground per IM specs. Use the correct bolts, tightened to the specified torque. Don't force parts – if something doesn't fit, re-check the drawings/instructions.
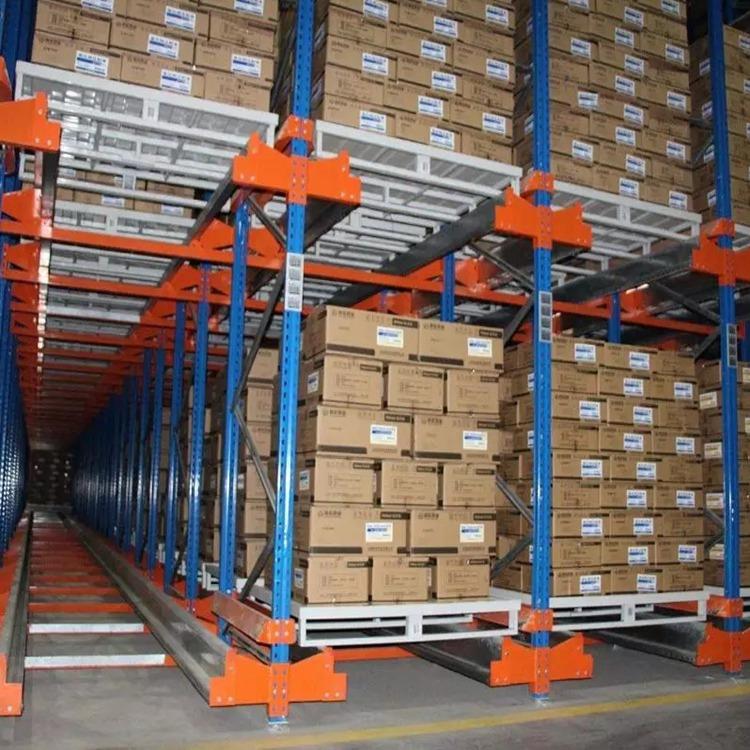
- Integrate with the Rack Structure: This is the critical connection. Rack Supported Platforms rely entirely on the strength and stability of the pallet racking they're attached to.Column Connection: Securely attach platform support brackets or beams to the designated rack upright columns at the specified heights. Use all specified bolts and tighten progressively and evenly to the specified torque value using a calibrated torque wrench. This is NOT a "good and tight" situation – under-torqued bolts loosen; over-torqued bolts can strip or weaken.Beam Connection: Connect cross-beams or trusses to the column supports and/or directly to the pallet rack beams as designed. Double-check levels and alignments as you go.
- Ensure Plumb & Level: Use quality levels constantly. The entire supporting structure must be plumb (vertical) and level within the tolerances specified by the manufacturer. Shimming at the base of rack uprights (if allowed per design) is sometimes necessary to achieve this, but never force components out of alignment to fit. An unlevel Rack Supported Platform compromises stability and safety.
Step 4: Decking Out – The Working Surface
The deck is where the action happens. Installation must be secure and complete.
- Choose the Right Decking: Wire mesh, bar grating, plywood (often fire-rated), or steel plate? This depends on your load, application (will forklifts drive on it?), and fire/safety codes. Ensure the decking material is rated for the intended live load.
- Secure Installation: Follow the IM meticulously for attaching decking panels.Wire Mesh/Bar Grating: Must be positively secured at every bearing point using clips, bolts, or weld pins as specified. No loose panels!Plywood/Steel Plate: Must be fastened securely with appropriate screws or bolts at prescribed intervals. Edges must be fully supported. Pay special attention to seams and edges to prevent tripping hazards or movement.
Step 5: Safety First, Last, & Always – Guarding & Access
This isn't optional. Falls are a leading cause of serious injury in warehouses. OSHA regulations (and common sense!) demand proper fall protection.
- Guardrails are Mandatory: Install guardrails on all open sides and ends of the Rack Supported Platform where a fall hazard of 4 feet or more exists (OSHA 1910.23). This typically includes:Top Rail: 42 inches +/- 3 inches above the working surface.Mid Rail: Halfway between top rail and deck.Toe Board: 3.5 inches minimum height to prevent objects from falling.Secure Connections: Guardrails must withstand 200 lbs. of force applied downward or outward. Bolts must be tight, connections robust. No wobbly rails!
- Safe Access is Crucial: How do people get up and down?Stairs: The gold standard for frequent access or moving tools/materials. Must be at the correct angle (30-50 degrees typically), have uniform risers/treads, landings for long runs, and handrails on both sides. Rack Supported Platform stairs integrate structurally.Ladders: May be acceptable for infrequent access to specific equipment. Must be fixed, secure, extend at least 3 feet above the platform, and have a safety cage or ladder safety system if over 20 feet tall (OSHA 1910.23). Always provide a clear step-off area at the top.Gates: Any access point (top of stairs/ladders, openings in guardrails) MUST have a self-closing safety gate that opens away from the platform. Gates must meet the same strength requirements as guardrails.
- Load Signs & Warnings: Clearly post the maximum permissible live load for the Rack Supported Platform in a highly visible location. Include any other critical warnings (e.g., "No forklifts" if not designed for them).
Step 6: The Final Check & Sign-Off: Don't Skip This!
Your Rack Supported Platform looks built. But is it safe?
- Comprehensive Visual Inspection: Go over every inch. Check for:Missing bolts, nuts, or fasteners.Loose connections (give critical bolts a final torque check with the wrench).Damaged components missed earlier.Secure decking with no gaps or movement.Properly installed, rigid guardrails and toe boards.Functional safety gates.Correct, visible load signage.Clearance from overhead hazards.
- Professional Engineering Certification (Highly Recommended): Especially for complex platforms, high loads, or critical applications, have a qualified Professional Engineer (PE) inspect and certify the installation complies with the design drawings, relevant standards (like ANSI MH16.1), and local building codes. This provides documented assurance and is often required by insurance.
- Formal Handover & Training: Document the inspection. Train all personnel who will use, work near, or supervise work on the Rack Supported Platform on:Load limits and what they mean.Safe access/egress procedures.Importance of guardrails and gates.Prohibited activities (e.g., climbing guardrails, overloading).Reporting damage or concerns immediately.
Step 7: Keeping It Optimal: Ongoing Maintenance & Vigilance
A Rack Supported Platform isn't "set it and forget it." Long-term safety and performance require diligence.
- Scheduled Inspections:User Checks: Brief visual checks by trained personnel before each use (look for obvious damage, loose bolts, guardrail integrity).Formal Inspections: Conducted by a competent person (internal or external) at least annually, or more frequently as dictated by use, environment, or regulations (e.g., OSHA 1910.22 requires walking-working surfaces be inspected "regularly"). Document everything. Look for corrosion, damage from impacts, loose or missing connections, overloaded areas, decking wear, guardrail stability.
- Zero Tolerance for Damage: Any damage (bent beams, cracked welds, damaged decking, impacted guardrails) must be reported immediately. Take the affected area OUT OF SERVICE until inspected and repaired by qualified personnel using genuine manufacturer parts or approved equivalents per the original design. Never jury-rig a repair on a Rack Supported Platform.
- Enforce Load Discipline: Continuously monitor what's placed on the platform. Prevent overloading or uneven loading. Ensure stored materials are stable and secured.
- Keep It Clean & Clear: Prevent debris, spills, or stored items from blocking access points, stairs, or safety gates. Good housekeeping prevents slips, trips, and fires.
Unlocking the Value: Your Optimized Rack Supported Platform
Done right, your Rack Supported Platform becomes an incredibly valuable asset. You've gained crucial square footage without expanding your building footprint. Workflow improves as tasks are elevated away from congested floor-level operations. Inventory gets a safe, organized home overhead. Maintenance crews have safe access to equipment. The key was taking the time to plan meticulously, assemble precisely according to the manufacturer's gospel, implement ironclad safety systems, and commit to ongoing vigilance.
Investing properly in the setup and maintenance of your Rack Supported Platform isn't just about compliance; it's about unlocking significant operational advantages while safeguarding your most important asset – your people. Now, go put that valuable vertical space to work, safely and efficiently!