Alright, let's cut to the chase. You need serious storage that won't buckle under pressure. Whether you're wrangling crates in your garage, organizing a bustling workshop, or taming warehouse chaos, heavy duty shelves are the backbone of your operation. But screwing them together isn't rocket science – unless you do it wrong. One shaky bolt, and you're risking thousands in damaged gear or worse.
Here’s the truth: Proper installation isn’t just about following steps; it’s about understanding weight, structure, and your space. Skip the guesswork. This guide walks you through every critical step – American DIY style.
Step 1: Plan Like a Pro (Before You Touch a Wrench)
Heavy duty shelves demand respect. Rushing in = regrets later.
- Know Your Load:What’s going on these beasts? Engine blocks? Boxes of tile? Calculate the total weight. Most heavy duty shelving units list a per-shelf AND total unit capacity. Exceed it, and you’re courting disaster.
- Map Your Space:Measure twice, buy once. Check ceiling clearance (especially for tall units!), doorway access, and leave space for doors/drawers to open. Use painter’s tape on the floor to outline the footprint. Does it block your breaker box? Can you still walk around it?
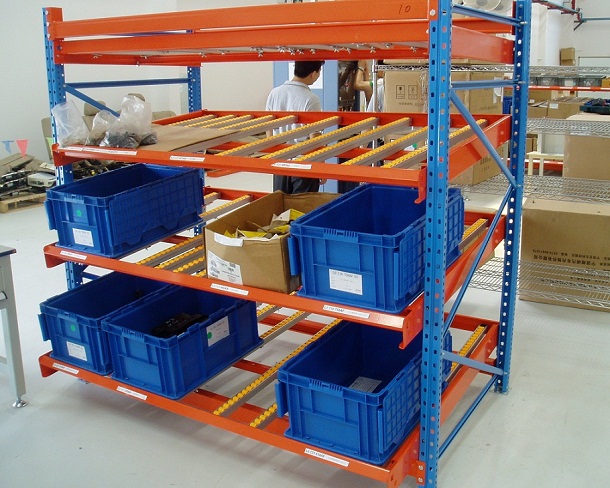
- Choose Your Weapon (The Right Shelves):Boltless Shelving (Rivet Style): Super common, faster assembly. Great for garages, basements, inventory rooms.Welded Frames: The tanks. Think industrial warehouses. Needs serious anchoring.Pallet Racking: For forklift-level storage. Requires professional design & anchoring.
- Gather Your Arsenal:Must-Haves: Level, Tape Measure, Rubber Mallet, Wrench Set (or Adjustable Wrench), Cordless Drill/Driver, Safety Glasses, Gloves.For Anchoring: Concrete Drill Bit, Masonry Anchors (for concrete), Heavy Duty Lag Bolts & Washers (for wood studs), Stud Finder (CRITICAL for drywall!).
Step 2: Assembly – Building Your Beast
Most heavy duty shelves come with decent instructions, but here’s where pros avoid pitfalls:
- Clear & Prep the Area: Move everything. Sweep that floor. You need elbow room.
- Lay Out Parts: Check everything against the packing list before you start. Missing a beam? Call the supplier NOW.
- Start with the Frame:Connect vertical uprights to base plates (if separate).Attach lowest horizontal beams FIRST. Keep things loose – finger-tight only!LEVEL IS GOD: Check level front-to-back AND side-to-side after attaching the first beams. Shim the base plates IMMEDIATELY if it’s wobbling. A slightly unlevel base gets exponentially worse as you build up!Work upwards, adding beams level by level. Use that rubber mallet to gently tap beams into place – don’t force them.
- Install Decking: Wire mesh, particle board, or steel panels? Follow the manual. Ensure decking is fully seated and secure. No overhangs!
Step 3: Anchoring – The Non-Negotiable Safety Step
This is where DIYers get lazy. DON'T BE THAT GUY. Unanchored heavy duty shelves are top-heavy death traps.
- For Concrete Floors:Mark hole locations through the base plate holes.HAMMER DRILL IS KING: Use a hammer drill setting with the correct masonry bit size for your anchors. Blow out dust!Insert concrete anchors (like wedge anchors or sleeve anchors rated for your load). Tighten firmly with a wrench.
- For Wood Framed Walls (Into Studs):FIND STUDS: Use a reliable stud finder. Mark center.Position the back of the shelf frame flush against the wall.Drill pilot holes through the frame’s rear uprights into the center of the studs.Secure with long, thick lag bolts and washers (e.g., 1/4" or 3/8" diameter, at least 3" long). Tighten securely.
- For Masonry Walls (Brick/Block): Use heavy-duty masonry anchors (like toggle bolts or sleeve anchors) following similar steps to concrete floors.
Pro Tip: Anchor the TOP of tall units (over 6 ft) to the wall too. It prevents dangerous forward tipping.
Step 4: Loading Up – Do It Smart, Do It Safe
Your heavy duty shelves are built and anchored. Now, load them like you mean it:
- Heaviest Stuff on Bottom: Always. This lowers the center of gravity.
- Distribute Weight Evenly: Don't pile everything on one shelf or one side. Think balanced.
- Center Loads: Keep heavy items centered between uprights, not hanging over edges.
- Use Front-to-Back Support: For long items (lumber, pipes), ensure they’re supported along their length or use shelf supports.
- Leave Clearance: Don’t jam stuff in. You need to see labels and access items safely.
- Secure Unstable Items: Use bins, straps, or shelf lips to prevent boxes or tools from falling.
Step 5: Maintenance & Safety Checks (Keep It Solid)
Heavy duty shelves aren't "set it and forget it."
- Regular Inspections: Every few months, visually check for:Bent beams, uprights, or decking.Loose bolts or anchors (retighten!).Corrosion (especially in damp areas).
- Respect the Limits: Recalculate weight if you add more stuff. Don’t push it!
- No Climbing: Use a proper ladder, not the shelves. They’re not jungle gyms.

Why Bother With All This? The Heavy Duty Advantage
Cutting corners on installing heavy duty shelves is playing with fire. Do it right, and you unlock:
- Serious Space Optimization: Get clutter off the floor and organized vertically.
- Unmatched Durability: Handle weights that would crush flimsy store-bought units.
- Safety First: Protect your gear, your workspace, and yourself from collapses.
- Long-Term Value: Quality heavy duty shelving lasts decades with proper care.
Final Word: Your Shelf, Your Responsibility
Installing heavy duty shelves isn’t complicated, but it demands attention. Measure meticulously, assemble carefully, anchor religiously, and load intelligently. Follow this guide, use common sense, and you’ll build storage that’s as tough as your needs. Now grab that wrench, put on your safety glasses, and get building!
Got questions about your specific setup? Drop ’em below – let’s troubleshoot!
"Good storage isn't about having space; it's about controlling chaos. Heavy duty shelves are your control center."